Ai Chatbot Adobe App

AI Commerce Chatbot connects to Adobe Commerce and syncs your
product catalog into Qdrant (Vector Database) to enable
faster and more accurate AI-powered responses.
It delivers a live chat experience inside Adobe Experience Cloud, allowing customers to easily
interact with the store and get instant answers about products and orders.
The chatbot supports quick actions such as:
- Order tracking
- Order information
- Email support
- WhatsApp contact
It also includes a resumable product synchronization system, allowing
long-running catalog sync jobs to continue from where they stopped, along with
status monitoring to ensure the product data in Qdrant stays
up-to-date and reliable.
Installation & Configuration:
Prerequisites
- A running Qdrant instance must be set up on your server before using the product synchronization feature.
- The Qdrant service should be accessible via a valid URL so the chatbot can store and search product embeddings.
- Ensure the VectorDB URL configured in the chatbot settings points to the active Qdrant instance.
Why this is important
Users must know that:
- Qdrant is not installed by the app.
- They must host it themselves.
- Sync will fail if the database is not running.
Access the App
- This app does not require manual installation or source-code deployment.
-
Once provisioned through Adobe Exchange, it automatically appears inside:
- Adobe Experience Cloud → Your Organization → App Builder Apps → AI Chatbot
- No local setup or CLI installation is required.
App Configuration (Adobe Commerce)
This app supports two authentication modes depending on your Adobe Commerce setup.
The app automatically detects which mode to use based on the credentials you provide.
In both cases, COMMERCE_BASE_URL is always required. The format differs depending on your deployment type:
-
For PaaS (On-Premise / Cloud-Hosted):
COMMERCE_BASE_URL must include your base site URL with the /rest/ suffix.
Example: https://<environment-name>.us-4.magentosite.cloud/rest/
-
For SaaS (Adobe Commerce as a Cloud Service):
COMMERCE_BASE_URL must be the REST API endpoint provided by Adobe Commerce.
Example: https://na1-sandbox.api.commerce.adobe.com/<tenant-id>/
Option A — PaaS (Self-Hosted Adobe Commerce)
If you are running Adobe Commerce on your own server or a cloud VPS, use an
Admin Integration Access Token.
How to obtain COMMERCE_ACCESS_TOKEN:
- Log in to your Adobe Commerce Admin Panel
- Go to System → Extensions → Integrations
- Click Add New Integration
- Give it a name (e.g. AiChatbot)
- Under the API tab, grant the following resource permissions:
- Catalog → Products (Read)
- Sales → Orders (Read)
- Stores → Settings (Read)
- Click Save
- Click Activate → Allow
- Copy the Access Token and enter it in the app configuration as COMMERCE_ACCESS_TOKEN
Required fields for PaaS:
- COMMERCE_BASE_URL — Your Commerce store URL including
/rest/ (e.g. https://mystore.example.com/rest/)
- COMMERCE_ACCESS_TOKEN — Admin integration access token (obtained above)
Leave IMS fields empty when using PaaS.
Option B — SaaS (Adobe Commerce as a Cloud Service)
If you are running Adobe Commerce as a Cloud Service, use
Adobe IMS OAuth 2.0 (Server-to-Server) credentials instead of a static token.
How to obtain IMS credentials:
- Go to Adobe Developer Console
- Open your provisioned App Builder project
- Click Add API → select Adobe Commerce as a Cloud Service → click Next
- Select OAuth Server-to-Server as the credential type
- Click Save configured API
- From the credential screen, copy the following values:
- Client ID → enter as IMS_CLIENT_ID
- Client Secret → enter as IMS_CLIENT_SECRET
- Organization ID → enter as IMS_ORG_ID (format:
XXXXX@AdobeOrg)
Required fields for SaaS:
- COMMERCE_BASE_URL — Your Adobe Commerce Cloud REST API endpoint (e.g.
https://na1-sandbox.api.commerce.adobe.com/<tenant-id>/)
- IMS_CLIENT_ID — Client ID from Adobe Developer Console
- IMS_CLIENT_SECRET — Client Secret from Adobe Developer Console
- IMS_ORG_ID — Organization ID from Adobe Developer Console
Leave COMMERCE_ACCESS_TOKEN empty when using SaaS.
Note: IMS tokens expire every 24 hours. The app automatically fetches a
fresh token on each request — no manual refresh is needed.
App Functionality:
Configure Chatbot Settings:
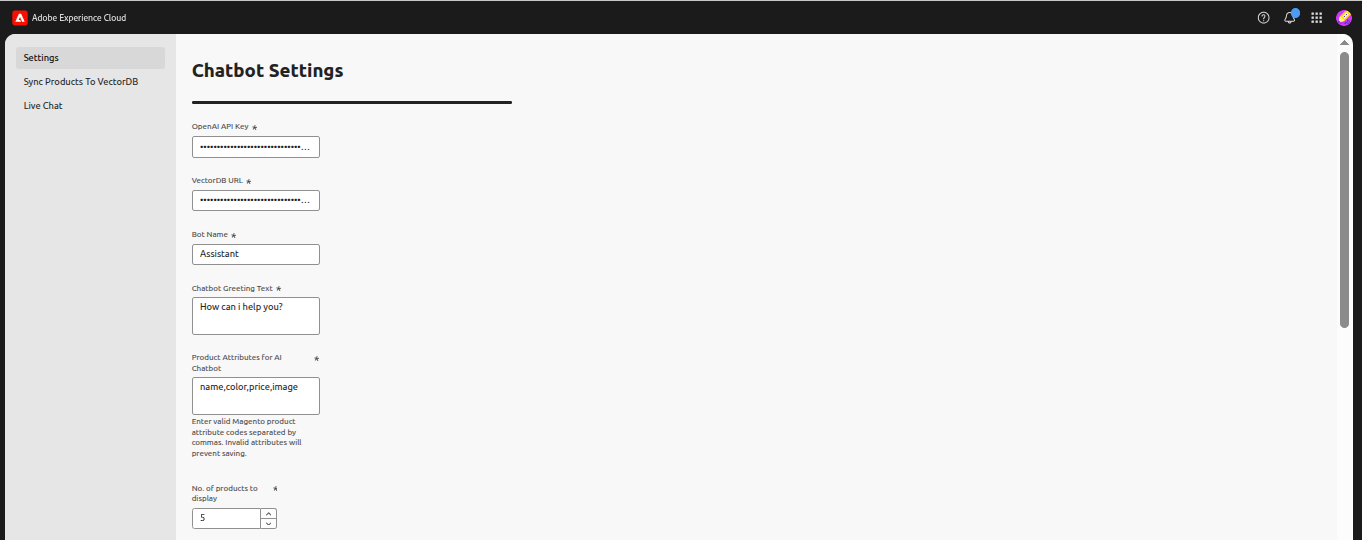
- Enter the required configuration details such as the OpenAI API key, VectorDB URL, VectorDB API Key, chatbot name, and greeting message. Only the Qdrant vector database is supported for storing and searching product embeddings.
- Provide the product attributes that the chatbot should use when answering product-related queries.
- Ensure the attribute list is valid so the chatbot can retrieve accurate product information.
- Set how many products should be displayed in the chatbot results.
Contact Information and Features:
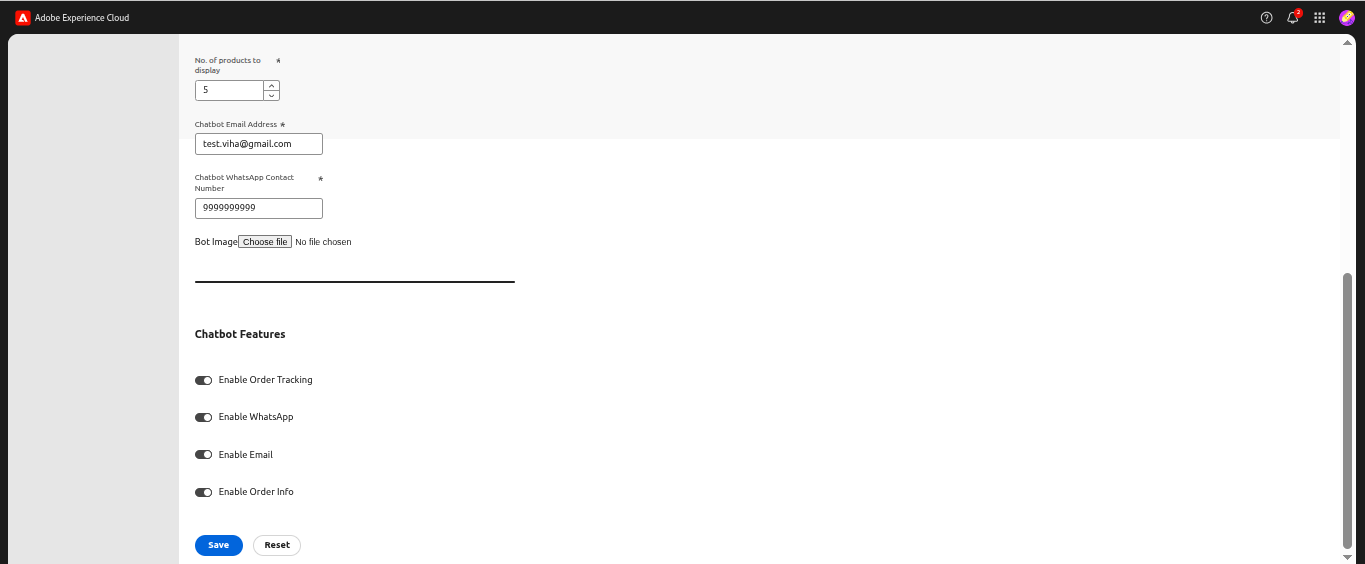
- Add the chatbot email address and WhatsApp number for customer communication.
- Upload a bot image to personalize the chatbot interface.
- Enable or disable features such as Order Tracking, WhatsApp support, Email support, and Order Information.
- Click Save to store the configuration or Reset to revert changes.
Settings Saved Confirmation:

- After saving the settings, a confirmation message appears.
- The green banner indicates that the configuration has been successfully saved.
Start Product Synchronization:
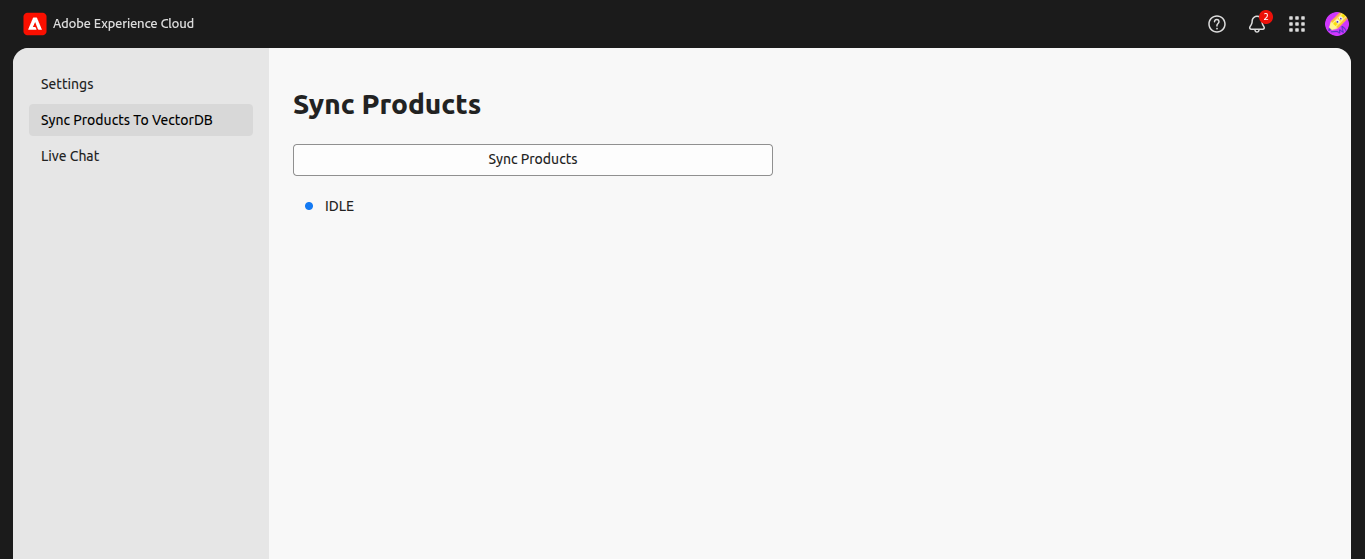
- Click the Sync Products button to begin syncing product data to the vector database.
- Before syncing starts, the system remains in an idle state.
Product Sync in Progress:
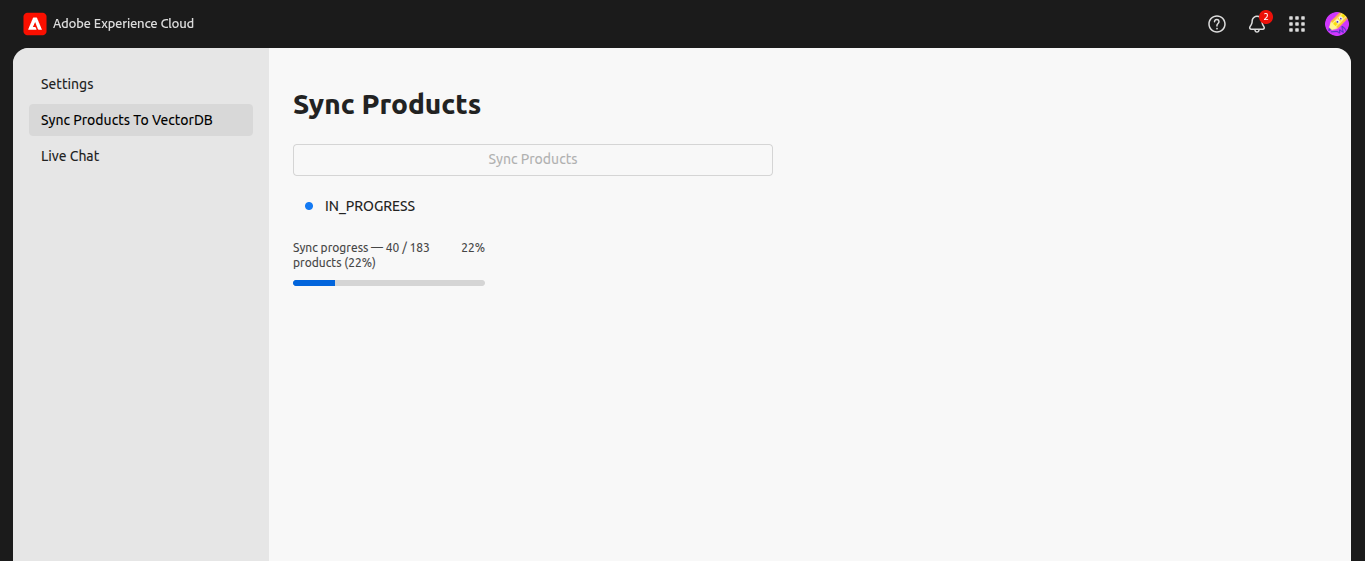
- While synchronization is running, the progress status is displayed.
- You can see how many products have been processed and the overall completion percentage.
Product Sync Completed:
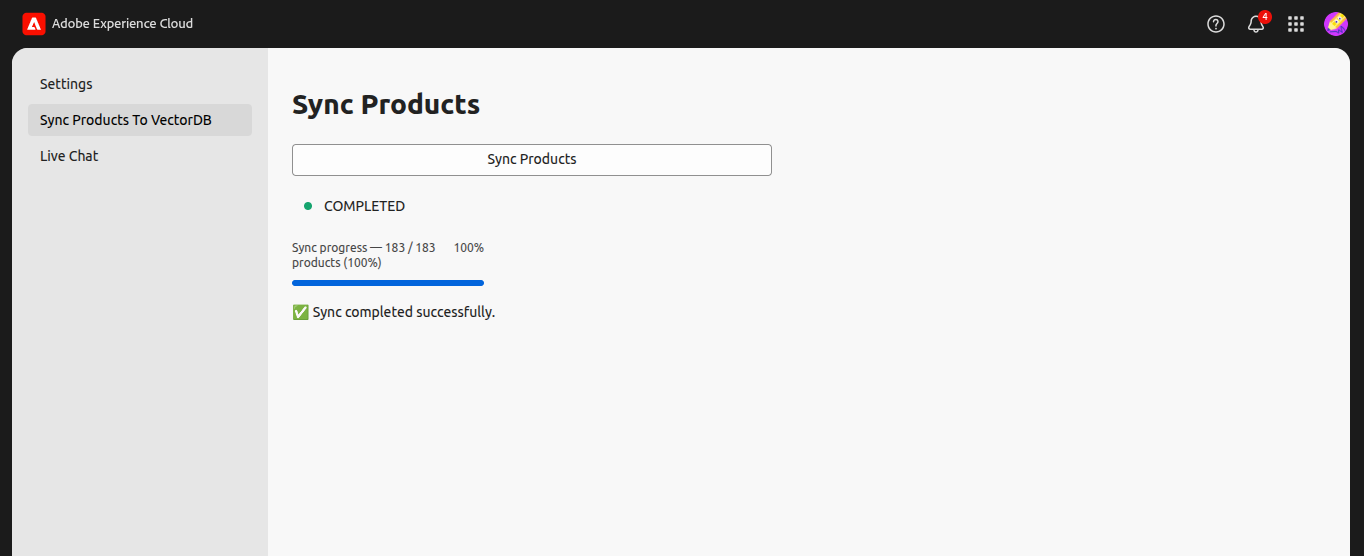
- Once synchronization finishes, the progress reaches 100%.
- A success message confirms that all products have been processed.
Chatbot Interface:
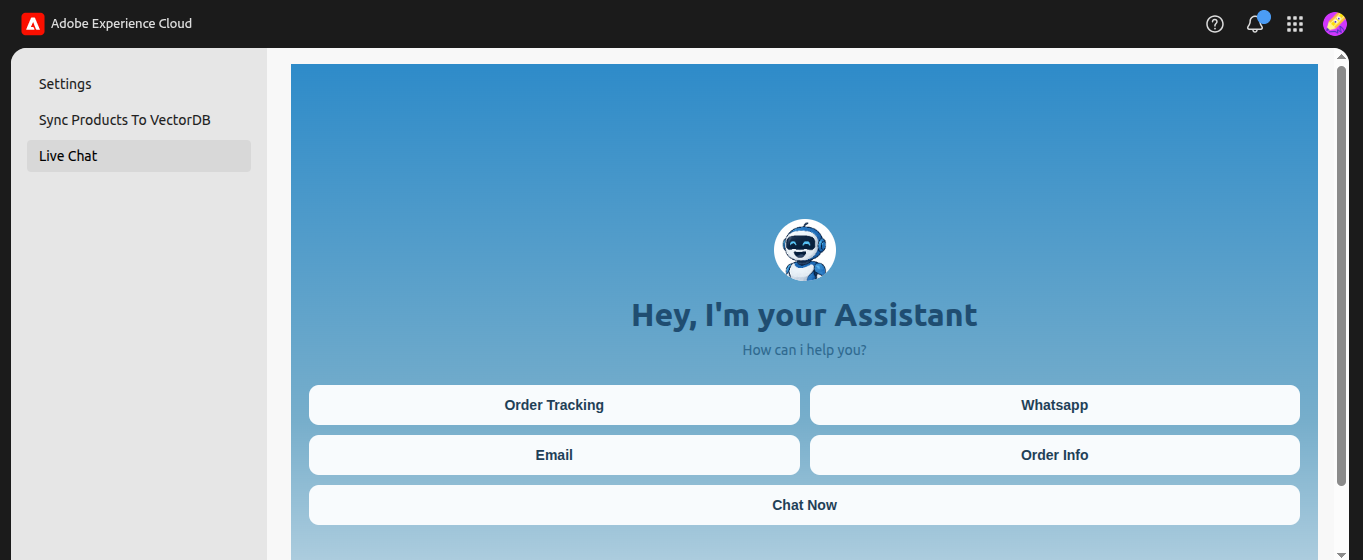
- Users are greeted by the chatbot with a welcome message.
- Quick action buttons allow users to access features such as Order Tracking, WhatsApp, Email, and Order Information.
- Click Chat Now to start interacting with the chatbot.
Order Tracking Request:
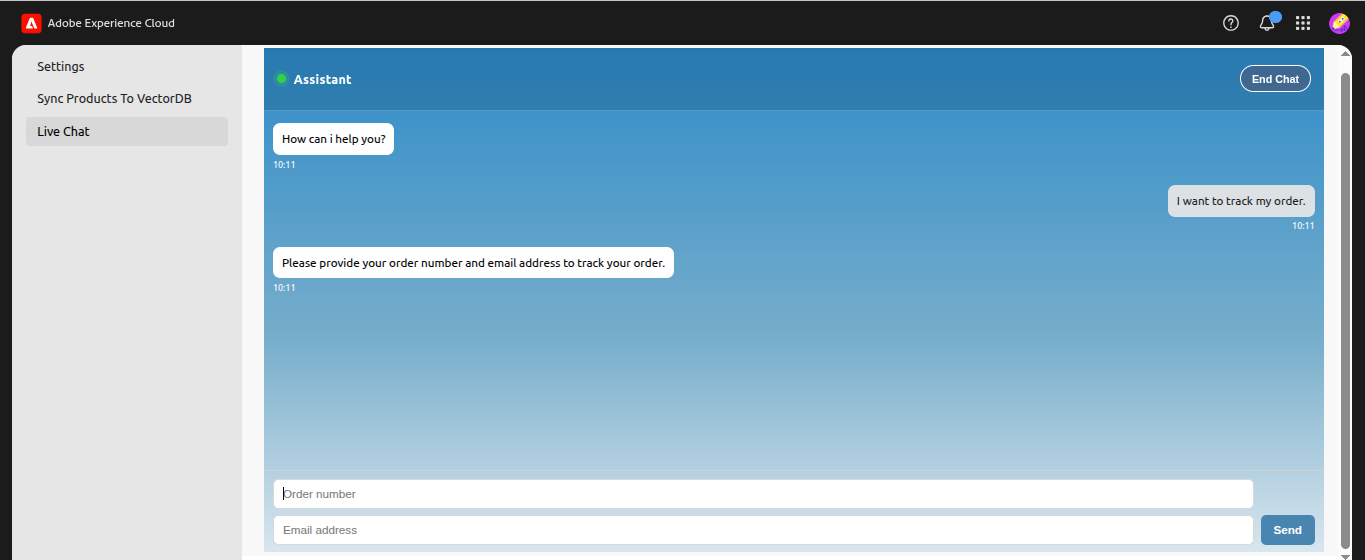
- The chatbot asks the user to provide their order number and email address.
- Users enter these details to retrieve their order status.
- This step helps the chatbot identify the correct order.
Order Status Response:
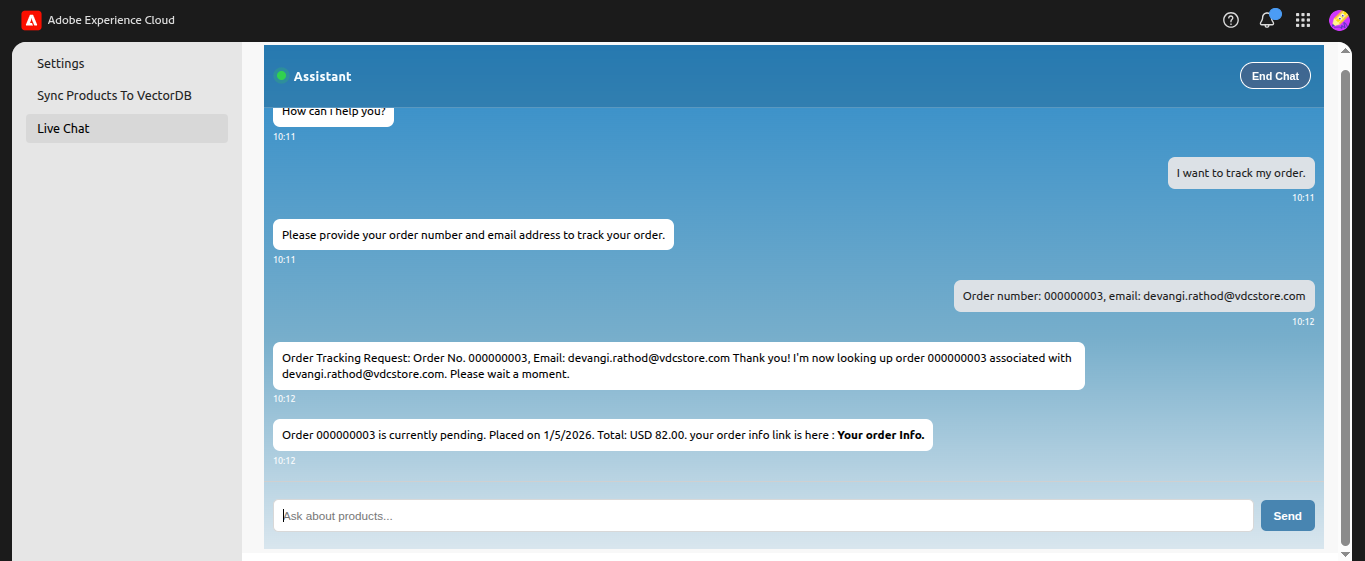
- The chatbot displays the order status along with the order date and total amount.
- A reference link is provided for additional order details.
- The chatbot confirms that the tracking request has been processed.
Product Results:
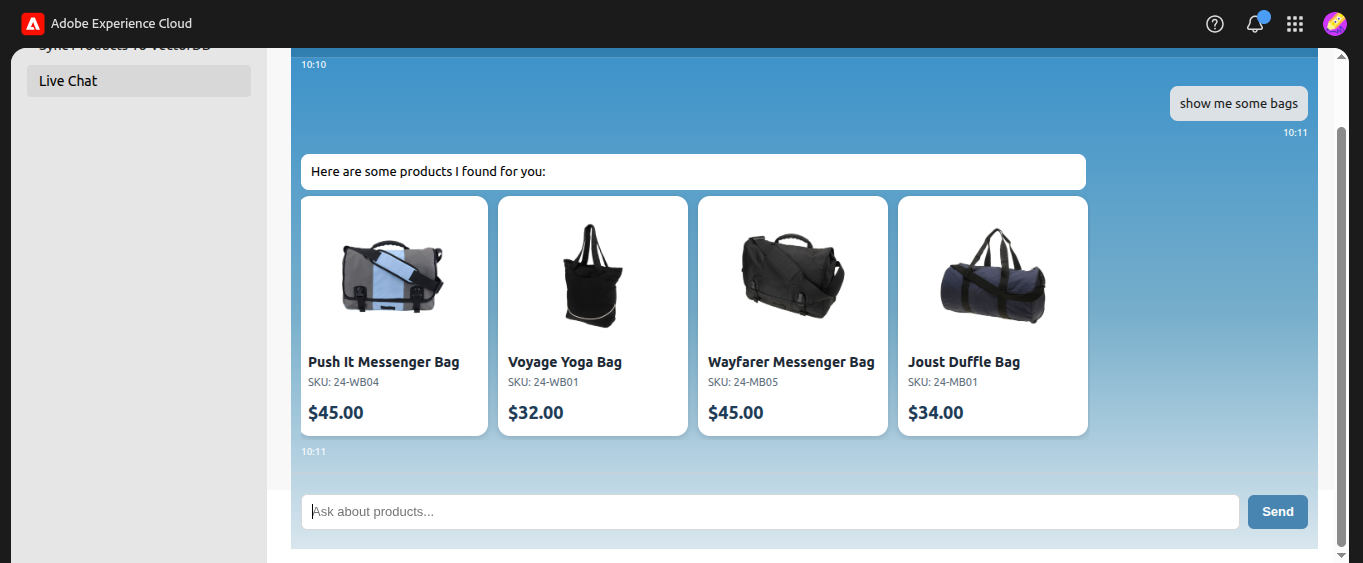
- The chatbot displays product cards based on the user's query.
- Each product card shows the image, product name, SKU, and price.
- In this example, the user searched for bags and the chatbot returned relevant results.
WhatsApp Support:
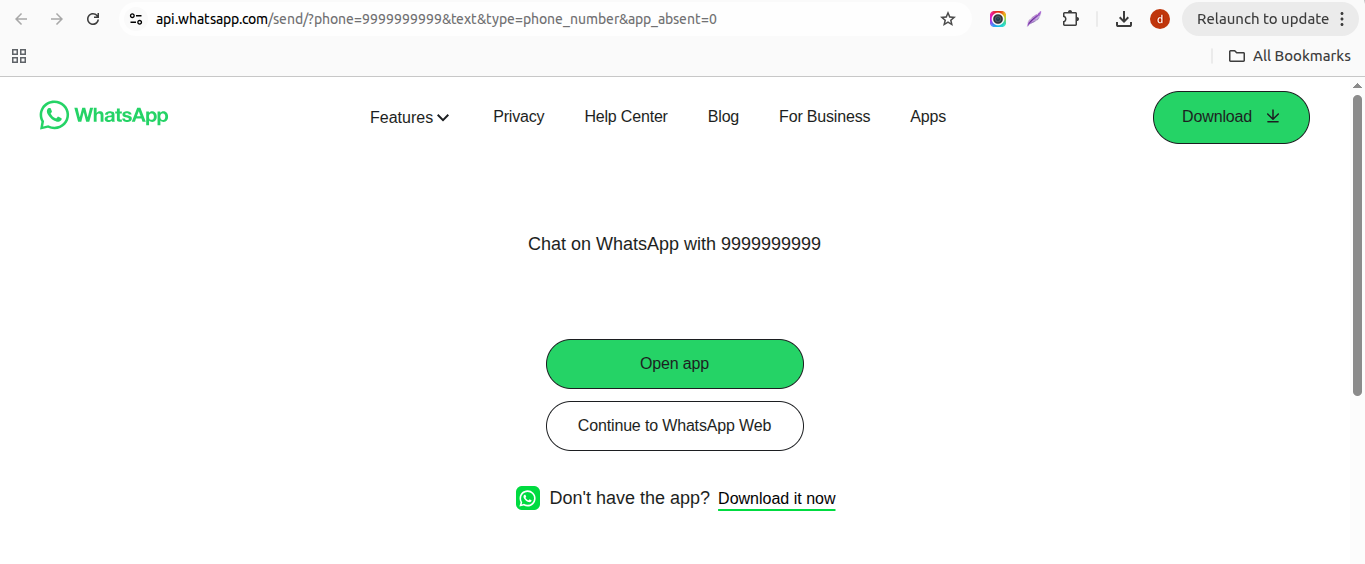
- When the WhatsApp option is selected, the system opens a WhatsApp chat link.
- The chat connects to the configured support phone number.
Email Support:
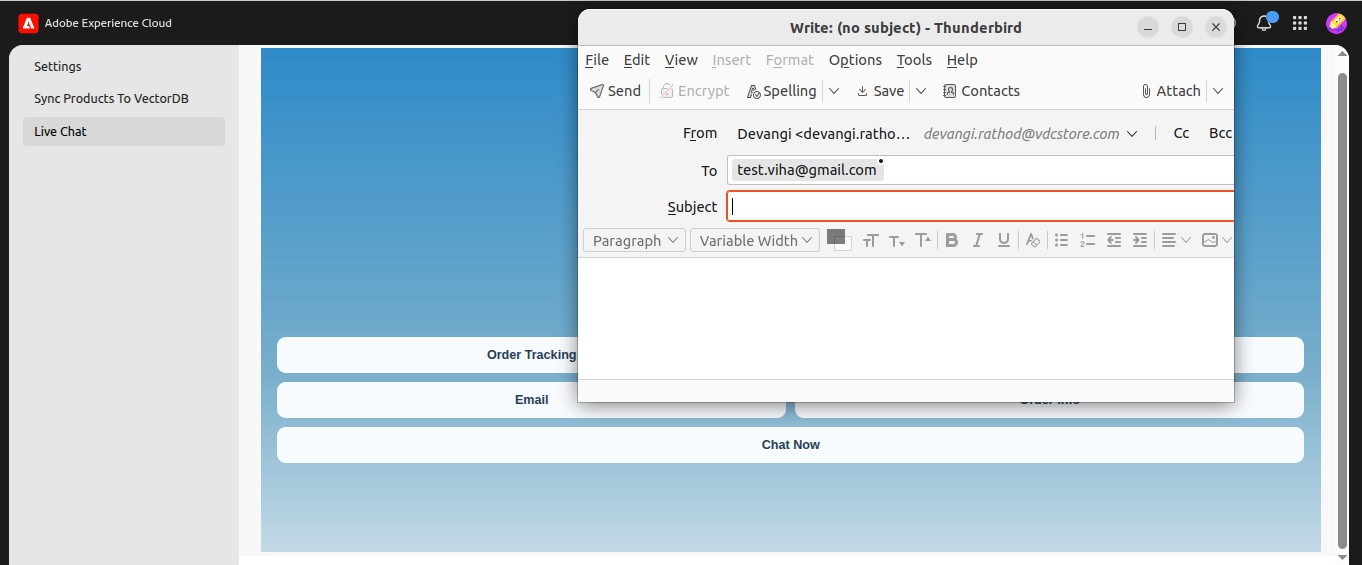
- Selecting the Email option opens the user's default mail client.
- The email is addressed to the configured chatbot support email.
- The user can write and send their message directly from the email window.

