We use cookies to improve your browsing experience, analyze site traffic, and support our marketing efforts.
Cookie Preferences
Manage your cookie settings below
EssentialRequired
Necessary cookies enable core functionality of the website. Without these cookies the website can not function properly. They help to make a website usable by enabling basic functionality.
Advertising
Marketing cookies are used to track and collect visitors actions on the website. Cookies store user data and behaviour information, which allows advertising services to target more audience groups. Also more customized user experience can be provided according to collected information.
Analytics
A set of cookies to collect information and report about website usage statistics without personally identifying individual visitors to Google.
The WebP Optimized Images module (Vdcstore_Webp) automatically converts your Magento store's PNG, JPG and GIF images into the modern WebP format. WebP images are typically 25–35% smaller than JPEG/PNG at the same visual quality, which reduces page weight, speeds up page load and improves Core Web Vitals and SEO.
Extension Installation
Download the zip file
Extract and put it into /app/code/
Open Cli in the Magento directory and follow the below commands:
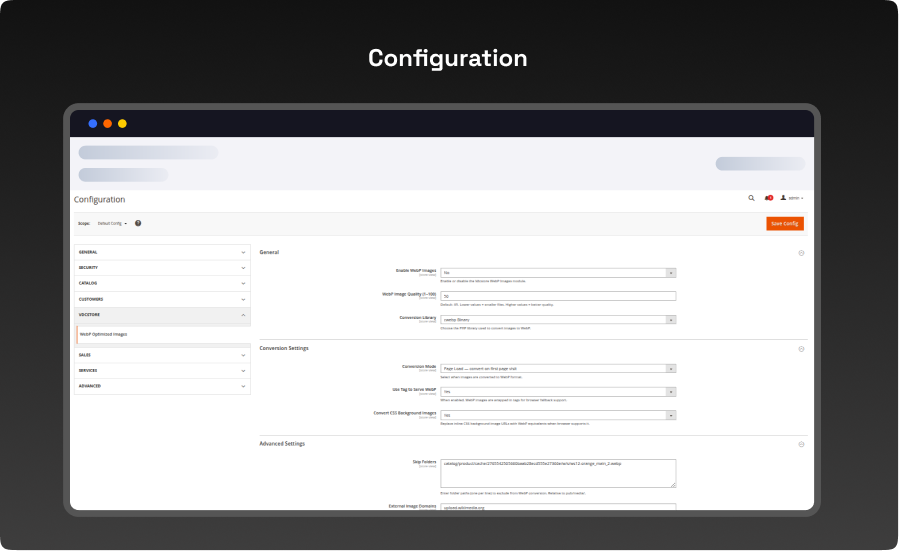
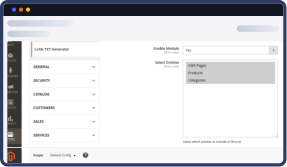
Enable WebP Images : This is the master on/off switch for the entire module. Setting it to Yes activates image scanning, conversion and WebP delivery on the storefront; setting it to No fully disables the module so no images are converted and no WebP markup is injected into pages, even if every other setting is configured.
WebP Image Quality (1–100): This controls the compression quality applied to every image the module converts, on a scale of 1 to 100 (default 85). A lower number produces a smaller WebP file at the cost of visual quality, while a higher number keeps quality closer to the original but reduces the amount of space saved. This single value is used for GD, Imagick and cwebp conversions alike.
Conversion Library : This decides which engine actually performs the PNG/JPG/GIF → WebP conversion: GD Library, Imagick, or the cwebp Binary. The dropdown automatically detects which of the three are available on the server and marks any missing option "(Not installed)", so you know at a glance which engines are ready to use (see Section 4 for how each one works and how to install it).
Max Image Size (KB): he maximum file size accepted per uploaded photo (shown here as 1024 KB).
Steps to Configure:
Step1 : Go to Stores > Configuration > Vdcstore > WebP Optimized Images (or click Configuration from the module menu).
Step2 : Set the Scope at the top-left if you need store-view/website level settings; otherwise leave it as Default Config.
Step3 : Expand the General section.
Step4 : Set Enable WebP Images to Yes to activate the module.
Step5: Enter a WebP Image Quality between 1–100 (default 85). Lower = smaller files, higher = better quality.
Step6: Select a Conversion Library from the dropdown (GD Library, Imagick, or cwebp Binary) — see Section 4 for details on each.
Conversion Library — Installation Steps
Imagick — Installation Steps :
Imagick needs two components installed: the ImageMagick program itself (with WebP support) and the PHP Imagick extension.
step 1 : Install the ImageMagick binary with WebP support.
Step 2:Verify WebP is compiled into ImageMagick.
Step 3 : Install the PHP Imagick extension.
Step 4 : Enable the extension and restart PHP.
Step 5 : Confirm PHP can see the extension and that it supports WebP.
Step 6:Select Imagick in the module configuration and save.
Go to Configuration > General > Conversion Library, choose cwebp Binary, and click Save Config.
Conversion Settings
The Conversion Settings group is the second section inside the module's configuration screen. It controls when images get converted and how the WebP output is actually delivered to the browser. It also has three functionality points:
Conversion Mode: This decides when images are converted. Page Load converts an image the first time it is requested on the storefront; Cron converts pending images automatically in the background every 5 minutes; Page Load & Cron (recommended) does both together so images convert instantly where possible and anything missed is caught by the background job; Manually via CLI turns off automatic conversion entirely, so an admin must run the console commands to convert images.
Use Tag to Serve WebP: When set to Yes, every converted image is wrapped in a element containing a WebP plus the original image as the fallback. This lets browsers that support WebP load the smaller file automatically, while older/unsupported browsers still receive the original image with no broken images.
Convert CSS Background Images : When set to Yes, background-image URLs found in inline styles and CSS are also rewritten to their WebP equivalents for browsers that support WebP, extending the same size savings to banners, sliders and other background-image elements, not just tags.
Steps to Configure :
Step 1: In Configuration, expand the Conversion Settings section.
Step 2: Choose a Conversion Mode: Page Load, Cron, Page Load & Cron (recommended), or Manually via CLI.
Step 3: Set Use Tag to Serve WebP to Yes to wrap converted images in a element with automatic browser fallback.
Step 4:Set Convert CSS Background Images to Yes if you also want inline background-image URLs rewritten to WebP.
Step 5: Click Save Config.
Advanced Settings
Step 1:In Configuration, expand the Advanced Settings section.
Step 2 : In Skip Folders, list any folder paths (relative to pub/media/) to exclude from conversion, one per line.
Step 3 : In External Image Domains, list any external base URLs whose images should also be converted, one per line.
Step 4 : Set Add "no-webp" CSS Class to Yes if your theme needs a fallback class for browsers without WebP support.
Step 5: Set Add Lazy Load Attribute to Yes to add loading="lazy" to converted images.
Step 6: Click Save Config.
Step 2 — Images Dashboard
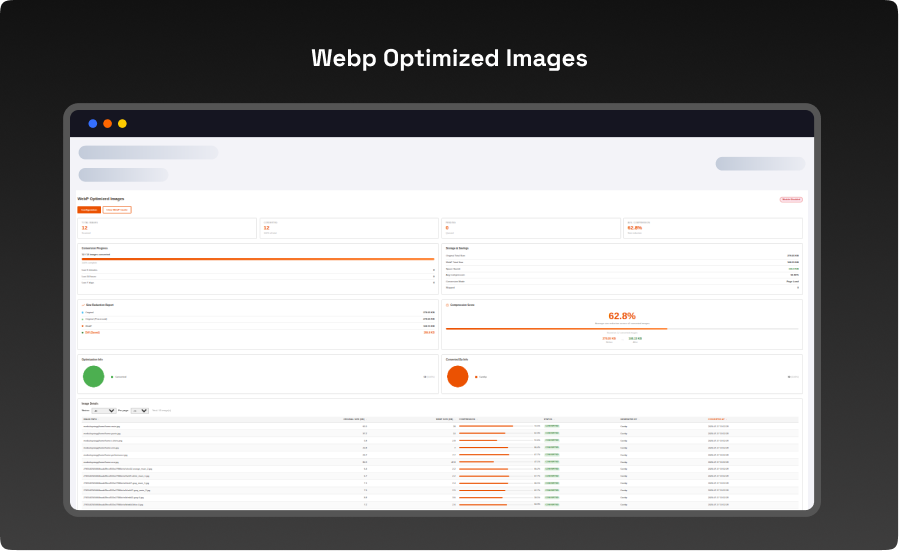
Step 1: Go to Vdcstore > WebP Images > Images Dashboard.
Step 2: Review the summary cards at the top: Total Images, Converted, Pending, and Avg. Compression.
Step 3: Check the Conversion Progress panel for a progress bar and recent conversion counts (last 5 minutes / 24 hours / 7 days).
Step 4: Check the Storage & Savings panel for original vs. WebP total size, space saved, and the active Conversion Mode.
Step 5: Review the Size Reduction Report and Compression Score panels for an overall before/after size comparison.
Step 6: Review the Optimization Info and Converted By Info pie charts to see status and library breakdowns.
Step 7: Use the Image Details table at the bottom: filter by Status, set Per Page, and click any column header to sort.
Step 8: Click Clear WebP Cache if you need to delete all generated WebP files and re-queue images (confirmation required).
Command-Line Conversion
Step 1:Open a terminal on the server and navigate to the Magento root directory.
Step 2: Run the scan command to queue images: bin/magento vdcstore:webp:scan [--dir=].
Step 3: Run the convert command to process the queue: bin/magento vdcstore:webp:convert [--batch=100].
Step 4: Repeat the convert command (or increase --batch) until the dashboard shows 0 Pending images.
Step 5: If you ever need to start over, run: bin/magento vdcstore:webp:clear to delete generated WebP files and reset records.
What you'll obtain with our Magento Technical Audit
With VDC Store's Magento eCommerce technical audit you'll gain expert separate in-depth analysis with an exhaustive summary
of the state of your store's code grade and overall usability.
An organizational summary of discoveries with preferences and a brief overview
3rd party extensions initial review
An exact description of results and suggested solutions
Database innocence review (to secure that data is recorded
precisely as planned)
Top preferences for your architects
Code quality examination (periodic reflection of your store
source code)
Examination of possible Magento core design changes
Speed and execution analysis (HTTP requests, optimizations,
exhale headers…)
By a technical appraisal, the client not only obtains information about the issues the store is facing but also this examination by
VDC Store allows them to acquire beneficial information and concepts for setting up programs to enhance sales and conversion
drivers.
Our analysis appreciates the essence of your business. We are not utilizing an automatic procedure that is used in every case. We
want to make sure you end up with suggestions based on the exact condition of your store. Start the discussion about the Magento
technical audit you're curious in by filling out the Contact Us form.
Why Choose the VDCStore Magento 2 WebP Optimized Images Extension
The VDCStore WebP Optimized Images module is a fully self-contained Magento 2 extension that automatically converts your store's PNG, JPG and GIF images to the modern WebP format directly inside your store. It covers everything from multi-engine conversion (GD, Imagick, cwebp) to picture-tag browser fallback, CSS background-image conversion, page-load and cron based automation, and a real-time savings dashboard — all without requiring any third-party image optimization service.
Very happy with the website service. Great communication, high-quality design, and timely delivery. Everything was handled professionally, and the end result exceeded our expectations. Would definitely recommend.
Ravinder Gupta
Verified
Great experience
Great experience working with this software company. The team is professional, responsive, and delivered exactly what was promised.
Erel Support
Verified
Extremely satisfied
I am extremely satisfied with the website they built for us. They listened carefully to our ideas, suggested improvements, and delivered a site that perfectly represents our brand.The process was smooth,strees-free,well organized.Great attention to detail and excellent support even after launch
Anurag Kumar
Verified
Great experience working with this team
We had a great experience working with this team for our website. They were Professional, responsive, and clearly understood our requirements from the start. The final website looks clean and modern and works perfectly across all devices. Communication was smooth throughout the project, and everything was delivered on time. Highly recommended for anyone looking for reliable website services and extensions.
Amol Bhoyate
Verified
Reliable, Professional, and High-Quality Web Development
We had a great experience working with VDC Store for our website development needs. From the very beginning, their team was professional, responsive, and attentive to our requirements. They clearly understood our vision and delivered a modern, user-friendly website that aligns perfectly with our business goals.
 Shopify Migration













 Verified